Showing posts with label Party Dishes. Show all posts

September 20, 2011

Blackberry-Pecan Snack Cake for The Cake Slice

This will be the last month The Cake Slice will be baking from the book Cake Keeper Cakes by Lauren Chattman. I have not been very active this year with our baking group due to work so made sure I made time this weekend to bake Blackberry-Pecan Snack Cake.

It just happens that my mother-in-law was also throwing a small party this weekend and she had put me in charge of desserts. I know that she adores fruits and streusel in her baked goods so made this cake for her.
The recipe asked for blackberries but blueberries or raspberries may also be used. I happen to have all three so decided to put a combination of all three berries. A simple recipe that uses only a little bit of butter with sour cream giving it richness. The batter is spiced by cloves and nutmeg while the streusel has cinnamon along with chopped pecans.
The party got a little hectic but was able to take a quick picture of the desserts table. Along with the Blackberry-Pecan Snack Cake front and center, I also baked Peanut Butter & Jelly Mini Muffins, Guava & Cheese Pastries, Leche Flan, Cheesecake with Blueberry Sauce, Coconut Sandwich Cookies with Passion fruit Cream and Brownies. My husband joined in the baking fun by making Cream Puffs and Seven-Layer Gelatin.
The cake was quickly eaten even with the assortment of other desserts on the table. I was glad I made time to bake this cake.

The Blackberry-Pecan Snack Cake recipe can be seen at Amazon, just click the "look inside" the book function.

November 21, 2010

Rellenong Bangus (Stuffed Milkfish) for Kulinarya Cooking Club


This month marks the first year anniversary of Kulinarya Cooking Club. Thanks to Kath, Trish and Trissa, all the way across the globe in Australia, for starting a group that highlights our colorful Filipino cuisine. To mark this special occasion, Anna and Dahlia chose a festive theme to celebrate: Relleno, a term for stuffed food like chicken, fish, crab or vegetables.


I made Rellenong Bangus (Stuffed Milkfish), one of my favorite dishes growing up. This type of fish is perfect for stuffing due to the thicker skin (just like salmon skin) but the drawback is that milkfish has more bones. Besides the vertebral spine, there are teeny tiny bones along the lateral and ventral sides. This is the reason Rellenong Bangus is a dish considered by many as a "special occasion" dish due to the laborious preparation that goes into the dish. When I say laborious, I only meant one thing: picking out the fish bones! I know this from experience because I was always the one who had to help pick them out. I didn't mind because my Mom would reward me with the best slice: the one with the fish belly, yum! :)


I decided to try something different in preparing my family's Rellenong Bangus recipe by starting with a boneless milkfish; a short-cut to avoid the dreaded bone picking. Most Asian markets now offer boneless milkfish (usually found in the frozen aisle), just make sure to buy ones that has not been marinated. A minor drawback is the fish still have their scales on but given the choice between bones or scales, it is easier to scale the milkfish (just takes minutes) than picking out the bones (may take hours).


Then it is just a matter of scraping out the meat. Setting aside the fish bodies to marinate in some soy sauce and kalamansi (or lemon). Saute the fish meat with onions, garlic, carrots, red bell pepper, raisins and seasoned with some soy sauce. Remove from heat and let it cool. (The cooling process is usually when you would go over the mixture to pick out the bones which can take hours.) I put the mixture in the freezer for about half an hour to speed the process. Once cool, mix in eggs and bread crumbs to help bind together when you put it back in the fish cavity.
 
Look no fish bones! :)
Then it is just a matter of frying or baking the fish until the skin is cooked through. This way of making Rellenong Bangus has been so easy that I won't need a special occasion to make my favorite dish. :)


Rellenong Bangus

2 milkfish, preferably deboned, thawed
2 TBSP soy sauce
2 TBSP freshly-squeezed kalamansi juice (or lemon)

1 medium onion, finely minced
1 clove garlic, finely minced
1/2 red bell pepper, finely minced
1/2 cup green peas, thawed
1/3 cup raisins
2 TBSP soy sauce
1 egg, slightly beaten
1/2 cup bread crumbs
oil, for frying

Prepare fish. Scale and rinse, pat dry. With a spoon, scrape meat off the skin, leaving belly intact. Put fish meat in a bowl, season with salt and set aside.

Place fish bodies in bowl along with soy sauce and kalamansi juice. Place in refrigerator to chill while you cook the fish meat.

Heat oil in pan over medium heat. Add onions and garlic, saute until translucent, do not let it brown. Add carrots and cook for about 2 minutes until soft. Add the fish meat and saute until meat become opaque, about 5 minutes. Season with salt and pepper. Add bell pepper, peas and raisins until heated though (the raisins would have soak some of the liquid the fish gave out). Take from heat, transfer to a bowl and let mixture cool.


Spoon the fish mixture into the fish and close it back. The seams were sewn together by using a regular needle and cotton thread. Lightly dredge the whole fish in cornstarch before frying it in a wok-ful of hot oil (350F). Fry until the skin is golden brown and crisp, about 5 minutes on each side.

Alternatively, you may bake the rellenong bangus in a 350F degree oven. Wrap the fish with a greased tinfoil, for about 40-45 minutes. Unwrap and broil to get some color in the skin. Though you won't get the crunchy skin when fried.

Please visit my fellow Kulinarya members for their Relleno creations:

Kath - http://www.acupcakeortwo.com/
Trisha - http://sugarlace.com/
Trissa - http://trissalicious.com/
Olive - http://www.latestrecipes.net/
Ninette - http://bigboldbeautifulfood.blogspot.com/
Peach- http://www.thepeachkitchen.com/
Althea- http://www.busogsarap.com/
Asha - http://forkspoonnknife.blogspot.com/
Malou - http://www.skiptomalou.net/
Cherrie - http://sweetcherriepie.blogspot.com/
Acdee - http://acdee.blogspot.com/
Valerie - http://www.acanadianfoodie.com/
Sheryl - http://crispywaffle.com/
Divina - http://www.sense-serendipity.com/
Anna - http://www.anniesfoodjournal.blogspot.com/
Dahlia - http://www.energychef.blogspot.com/
Joy - http://joyjoycreativeoutlet.blogspot.com/
Maribel - http://www.foodgeek.webs.com/
Tressa
Jen - http://www.jen-at-work.blogspot.com/
Pia - http://bisayajudkaayo.blogspot.com/
Malaka - http://thegrandinternational.com/.
Mimi - http://lapinchecocinera.blogspot.com/
Erika - http://ivoryhut.com/
Kat - http://www.caterersearch.com/tabletalk/default.aspx
Lala - http://thislittlepiggywenttothemarket.blogspot.com/
Selfie - http://eats.sefiebee.com/
Connie Veneracion - http://homecookingrocks.com/
Oggi - http://oggi-icandothat.blogspot.com/
Katrina Kostik - http://lardonmyfrench.blogspot.com/
Rochelle Ryan - http://www.whydiss.blogspot.com/
Marica - http://cuppycreme.blogspot.com/
Diona - http://titaflips.blogspot.com/
Rowena - http://saraplicious.blogspot.com/

August 19, 2010

Paella (and the best-laid plans)


I had the best plans laid out this summer. I told myself that once my children are on summer break, I will devote some time on this little blog of mine. "One post a week, at least" was what I said. But then work called, a 2-week gig wasn't bad but next thing I knew it kept getting extended: 16-hour days, staying until past midnight at Disneyland (without my family, it was not enjoyable at all), driving all over the city had kept me away from my kitchen. Work is done for now and I am still feeling it's effects; these couple of weeks I have just been catching up on sleep and hanging out with my boys. And I'm very glad to be cooking again in my own kitchen.


One more thing about best-laid plans. I cooked paella for the first time last week. Months ago, my husband mentioned he had only eaten paella at restaurants and had an idea to cook it at home. My husband, a kitchen gadget-freak, (which I am grateful for) wanted to get the right equipments for cooking paella so first thing we searched for was a paella pan. Williams-Sonoma only sold copper pans which are beautiful but was way beyond our budget. Sur La Table and LaTienda.com had traditional steel pans which costs about $30 but after diligent search we found the same pan at Cost Plus World Market for half the price! Unsure why another several weeks would pass before we bought the paella rice but then both the pan and rice stayed in the kitchen for awhile. Circumstances like my summer job and husband's month-long detox cleanse delayed cooking paella even further.

So last week at the dinner table, the kids finally decided to "just cook paella already!" To celebrate the end of my job and their dad losing 20 pounds, the kids said (Ha, and I'm sure they just heard a little too much discussion and planning about this dish.) So over the weekend, we drove all over searching for Spanish chorizo and made sure to get the freshest seafood. The seafood market didn't have fresh mussels but we didn't want another reason to delay our cooking so we compensated by buying extra prawns. My husband also bought a dungeness crab but decided to cook this separately. We even bought Spanish saffron even though we had 4 grams of Iranian saffron in our pantry (Do you know if there is a difference in taste between the two?)

Growing up in the Philippines, my family had always cooked paella. It was not as authentic as they do in Spain for we used sticky rice and safflower (instead of saffron) and my lola (grandma) and aunts just cooked paella in a wok! Another vivid memory was the paella was always cooked over a wood-burning stove. So I attempt to replicate my family's version of paella using the BBQ.


Paella
serves 6-8 people

1/2 tsp saffron
3 cups chicken broth
2 TBSP olive oil
chicken: 2 wings, cut at joints & 2 thighs, deboned & cut into thirds
Spanish chorizo, cut 1/2 thick in a bias
1 red bell pepper, cut into strips
1 med onion, finely minced
4-5 garlic cloves, finely minced
5-6 plum tomatoes, seeded & finely chopped
1 TBSP paprika
1 bay leaf
2 cups paella rice
prawns, 8-16 pieces
clams 12-20 pieces
3/4 cup peas, thawed if frozen

Crush saffron in mortar & pestle, add to chicken broth and set aside.

Heat pan over medium high heat and brown chicken, 2-4 minutes per side. Remove from pan and set aside.

Add the chorizo and brown on all side. Remove and place together with chicken.

Add the red bell pepper to soften a little, do not brown. Remove and put along the chicken & chorizo. Drain some of the oil until 2 TBSP of oil is left.

Add onions until soft, about 2 minutes, add garlic and cook until fragrant.

Place tomatoes and stir until thickened, about 2 minutes. Stir in paprika and bay leaf.

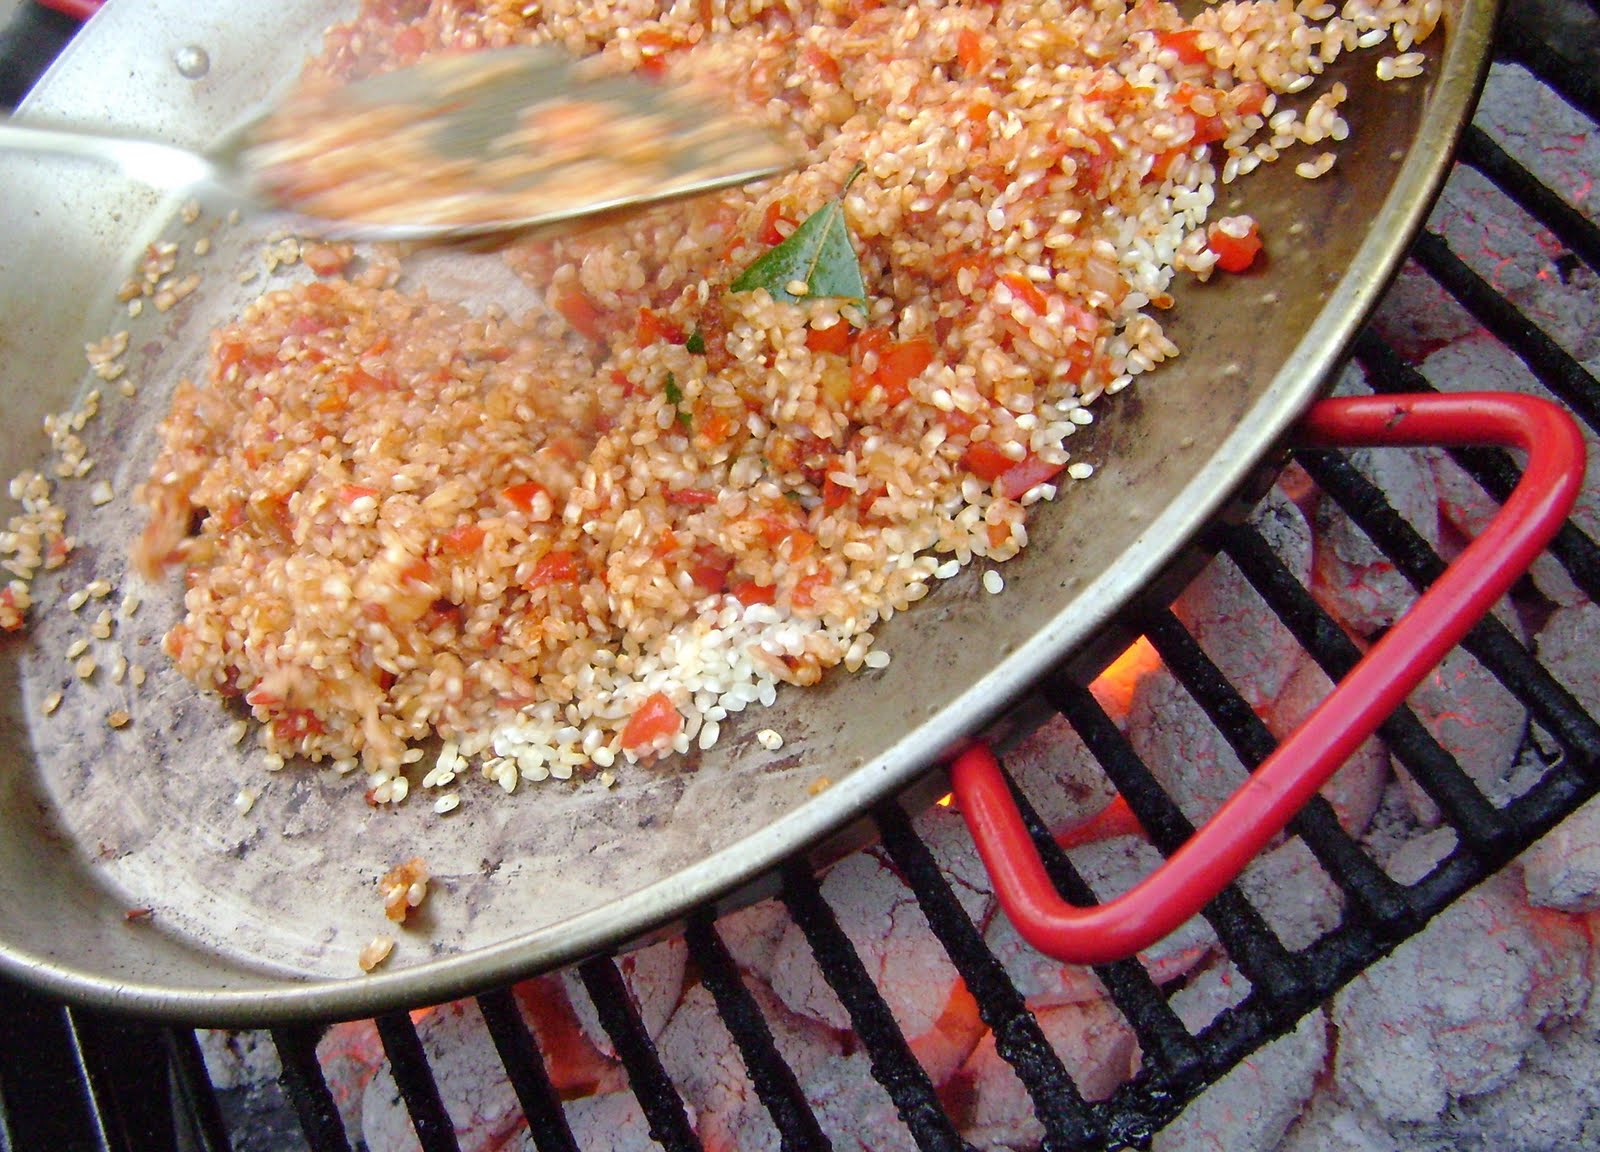
Add rice and stir until rice is completely covered by tomato mixture,about a minute. Add broth and bring to a boil.

Return chicken back in pan. Reduce heat to medium (I just scattered the charcoal around) and let it simmer until most liquid has evaporated, about 10 minutes.

Test the rice for doneness (if still hard, cover pan with tin foil for few minutes). Once rice is done, place prawns, clams and return the chorizo and bell peppers. Sprinkle the peas. Dish is done when clam shells open and prawns turn pink. Take off the heat and cover again in foil. Let it stand a few minutes. Serve.
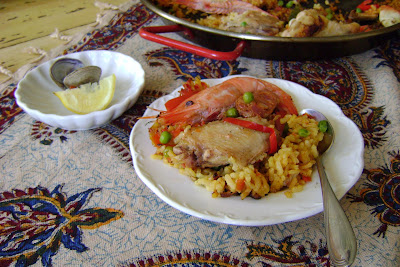

I was very pleased with the results being this my first try. I liked that I used the BBQ grill since I was worried about the paella not cooking evenly if I would have used the stove top. Though I felt a little rush in the beginning (the chicken could be browned more), I think it was the nerves and excitement of cooking it plus having an audience (my husband and our boys) watching my every move got to me a little. Thank you to my husband for taking the action shots and my boys who arranged the prawns and clams so beautifully. I am excited to cook paella again soon.

So in the end things don't always turn out the way we plan. And even though this summer is almost gone, my family and I would remember this as the summer we made paella.

June 22, 2010

Pork BBQ on a stick for Kulinarya Cooking Club

When I found out this month's theme is Pinoy BBQ, I immediately thought of cooking Pork BBQ on a stick - a childhood favorite! Usually considered street food, vendors hawk these (and other cuts of meats on a stick) out on the street corners cooked from their makeshift grills. They are also a very popular party food. When you serve them, they are usually the first thing that gets eaten right away; people look out for and hoard these right off the grill (at least in my family)!

I learned to make Pork BBQ sticks from my Lola (grandma). She had already been in the U.S. for several years before my family came to join her; I was fourteen. She had always been in charge of all the cooking for our family parties. When I arrived, I was not sure how it happened but I ended up as her assistant in the kitchen. I "got stuck" peeling cloves after cloves of garlic and crushing them using a pandikdik (mortar & pestle); never a food processor. The next day, the daunting task of skewering the cold meat that's been marinating in the fridge overnight. Daunting only because when our big family cooks Pork BBQ sticks, we start with at least 20 pounds!

My Lola's recipes were never written and she was quite a bossy lady (I was always a little scared of her) so I just did what she tells me. Along the way, I picked up a few kitchen wisdom from her. The one that stuck in my head with this Pork BBQ stick recipe (besides using 7-up soda) is a 1-to-1 ratio of sugar and soy sauce. Then you can play around with the other seasonings: more crushed black pepper or siling labuyo (bird's eye chili) if you want it spicy, add more garlic to make them extra garlicky (we always do), even a few drops of patis (fish sauce) and/or kalamansi juice if you like a little tang to them.

Another thing I remember from cooking Pork BBQ sticks with my Lola was she never basted with ketchup when they're grilling. It just masked the already flavorful meat, she said once. So I don't but would brush on some of the marinade to keep them moist. It also helps to NOT use a lean cut of meat; pork shoulder is a great choice here.

Pork BBQ sticks are usually served with achara, pickled green papayas. I haven't had luck eyeing green papayas but had some mangoes today so I combined them with cucumbers to make a quick relish. And since the coals were still burning in the grill, I threw in some eggplants to roast. Once cooked, I just slit them open and topped them with tomatoes for a quick side dish to make it a complete meal. I have posted a fire-roasted eggplant salad once before here.

Lola's Pork BBQ on a Stick
makes about 20 skewers

1 head of garlic, peeled and crushed
1 TBSP salt
1 tsp. black pepper
1/4 cup sugar
1/4 cup soy sauce
2 TBSP freshly-squeezed kalamansi juice (optional)
2 pounds pork butt, cut into 1/4 inch slices
3/4 cup 7-Up soda

Combine the first 6 ingredients in a small bowl. Stir until all the sugar is melted.

Place pork in a shallow glass container. Pour in the marinade and stir in until all the meat is coated. Pour in the soda and stir again. Cover tightly and place in the refrigerator overnight, or for at least 8 hours.

Soak skewers 30 minutes before using. Skewer meat and set aside. You may use marinade by placing in small pan and boil for 2 minutes. Set aside.

Prepare grill. Cook Pork BBQ sticks over medium-hot coals about 3-5 minutes on each side, basting every so often. Serve immediately.


Kulinarya was started by a group of Filipino foodies who are passionate about the Filipino culture and its colorful cuisine. Each month we will showcase a new dish along with their family recipes. By sharing these recipes, we hope you find the same passion and love for Filipino Food as we do.


Please visit my fellow Kulinarya members for their Pinoy BBQ creations:

Kath - http://www.acupcakeortwo.com/
Trisha - http://sugarlace.com/
Trissa - http://trissalicious.com/
Olive - http://www.latestrecipes.net/
Ninette - http://bigboldbeautifulfood.blogspot.com/
Peach- http://www.thepeachkitchen.com/
Althea- http://www.busogsarap.com/
Asha - http://forkspoonnknife.blogspot.com/
Malou - http://www.impromptudiva.com/
Cherrie - http://sweetcherriepie.blogspot.com/
Acdee - http://acdee.blogspot.com/
Valerie - http://www.acanadianfoodie.com/
Sheryl - http://crispywaffle.com/
Divina - http://www.sense-serendipity.com/
Anna - http://www.anniesfoodjournal.blogspot.com/
Dahlia - http://www.energychef.blogspot.com/
Joy - http://joyjoycreativeoutlet.blogspot.com/
Maribel - http://www.foodgeek.webs.com/
Tressa
Jen - http://www.jen-at-work.blogspot.com/
Pia - http://bisayajudkaayo.blogspot.com/
Malaka - http://thegrandinternational.com.
Mimi - http://lapinchecocinera.blogspot.com
Erika - http://ivoryhut.com/
Kat - http://www.caterersearch.com/tabletalk/default.aspx

May 23, 2010

Pancit Bihon Guisado for Kulinarya Cooking Club


This month's Kulinarya Cooking Club theme is pancit. Olive and I chose to highlight noodles, the Chinese influence to the Filipino cuisine. Noodles signify long life and so they are served on birthdays as part of the celebration. My youngest son turned six this month so there were plenty of pancit cooked and enjoyed.

There are many types of pancit in the Filipino cuisine based on the type of noodles used and the region a pancit dish originated. Pancit Bihon, noodles made from rice, is the type usually thought of when one talks about pancit so I decided to make them here.


Pancit Bihon
Makes 8 large portions or can serve up to 20 as part of buffet

1 lb pork meat
2 garlic cloves, smashed
1 small onion, quartered

1 8-oz package pancit bihon

2 TBSP oil
2 garlic cloves, minced
1 medium onion, minced
1 lb shrimp, peeled & deveined
2 ribs celery, julienned
2 medium carrots, julienned
1 small cabbage, shredded
1 lb sugar snap peas, trimmed
soy sauce, up to 1/4 cup
3 chinese sausage, steamed and sliced diagonally

kalamansi (or lemon) for serving (optional)


Place pork in medium pot with garlic and onion and 1 tsp salt, put enough water (about 3 cups) to cover meat and bring to boil. Reduce heat and simmer until meat is tender, about 20 minutes. Cut meat to strips. Reserve broth and keep hot under low heat.

Before heating wok, soak noodles in hot tap water (soak about 5 minutes).

In a large wok, heat oil over high heat. Saute garlic & onion until translucent. Add shrimp, season with salt and pepper and sauté until shrimp turn pink, remove from wok and reserve (to avoid overcooking).

Add celery and carrots and sauté for about a minute, add cabbage and peas and sauté 2 minutes longer and season with soy sauce. Add reserved broth and quickly bring to boil. Once it boils, take most of the vegetable to avoid overcooking. Drain noodles and add to boiling broth. Keep stirring until noodles soak up broth and to avoid sticking. Lower heat to low and add sausage and return shrimp and vegetables to warm through. Season to taste with more salt and pepper and/or soy sauce.

Right before serving, sprinkle with scallions and kalamansi. Enjoy!


Kulinarya was started by a group of Filipino foodies who are passionate about the Filipino culture and its colorful cuisine. Each month we will showcase a new dish along with their family recipes. By sharing these recipes, we hope you find the same passion and love for Filipino Food as we do.


Please visit my fellow Kulinarya members for their Pancit creations:

Kath - http://www.acupcakeortwo.com/
Trisha - http://sugarlace.com/
Trissa - http://trissalicious.com/
Olive - http://www.latestrecipes.net/
Ninette - http://bigboldbeautifulfood.blogspot.com/
Peach- http://www.thepeachkitchen.com/
Althea- http://www.busogsarap.com/
Asha - http://forkspoonnknife.blogspot.com/
Malou - http://www.impromptudiva.com/
Cherrie - http://sweetcherriepie.blogspot.com/
Acdee - http://acdee.blogspot.com/
Valerie - http://www.acanadianfoodie.com/
Sheryl - http://crispywaffle.com/
Divina - http://www.sense-serendipity.com/
Anna - http://www.anniesfoodjournal.blogspot.com/
Dahlia - http://www.energychef.blogspot.com/
Joy - http://joyjoycreativeoutlet.blogspot.com/
Maribel - http://www.foodgeek.webs.com/
Tressa
Jen - http://www.jen-at-work.blogspot.com/
Pia - http://bisayajudkaayo.blogspot.com/

March 21, 2010

Kulinarya Cooking Club: Empanadas


Empanada is something I have never done before. So when I found out it was our theme for this month, I was lost for ideas. I have no recollection of my family making this at home but we have eaten them plenty of times and always enjoyed them. My mother usually would just buy them from the bakery or order it from a neighbor who makes them from scratch. Growing up, I do remember stashing a few of these from my brothers. Sometimes I would hide them so well, I'd forget where I hid them.


So this month I tackle Empanada with the help of, what is considered by many, a classic Filipino cookbook: The Philippine Cookbook by Reynaldo Alejandro.

The recipe for Empanada is simple enough. Brown some ground beef with garlic and onions. Stir in some chopped potatoes and cook them all until the potatoes are tender. Season with S&P and mix in a few raisins. My husband is not too keen on the raisins so I omitted them :( but when I was filling the empanada pastry, I snuck in a few raisins in one just for me. :) I should have marked this one because it got lost in the fryer and just remembered it when the family sat down to eat them for lunch. So our empanada lunch became a contest for my boys on who can get the lucky empanada. :)


Empanada
as it appears in book
yields 20

1 pound ground beef (I used rib-eye)
1 clove of garlic, minced
1 small onion, minced
1 cup potato, diced (1 large)
1 tsp salt
1/4 tsp pepper
1/2 cup raisins (omitted)

Brown ground beef. Push meat to one side and saute garlic and onion until brown, then add onion. Mix the meat, garlic and onion, then add potatoes. Stir and cook until potatoes are tender. Season withsalt and pepper and mix in raisins.

Empanada Pastry

3 cups all-purpose flour
4 TBSP sugar
1/2 tsp salt
1/2 cup water
1/3 cup oil
3 egg yolks (plus some egg whites for sealing empanadas)

Mix and knead all ingredients until dough is soft. On a floured board, roll out 1/8-inch thick. Cut into 4- or 5-inch diameter circles (use wide-mouthed jar or cup for cutting circles). Put a spoonful of meat filling in center of each circle. Fold to half-moon shape, wet edges with egg white, press and seal sides. Deep fry until golden brown and drain. Or, instead of deep frying, pies can be baked in preheated 425F oven for 15 to 20 minutes or until golden brown.


My family enjoyed the empanadas and have requested for more. I was not sure why I never made these before but will surely make them more often.

Kulinarya was started by a group of Filipino foodies living in Sydney, Australia who are passionate about the Filipino culture and its colorful cuisine. Each month we will showcase a new dish along with their family recipes. By sharing these recipes, we hope you find the same passion and love for Filipino Food as we do.

Please visit my fellow Kulinarya members for their Empanada creations:
Trish
Kath
Trissa
Olive
Peach
Cusinera
Asha
Malou
Cherrie
Acdee
Valerie
Bel
Divina

If you’re interested in joining our Kulinarya Cooking Club, please feel free to drop by and leave a comment – we would love to hear from you!

December 1, 2008

Birthday Cupcakes: Vanilla, Chocolate and Black & White Cupcakes with Pomegranate Buttercream Frosting


We were invited to an 18th birthday for a beautiful, sweet girl who we have known since she was little. (Her sister and my cousin went to school together since first grade. All the while, we've gotten to know her and her parents and they have become part of the family.) When I RSVP'ed, D. and I offered to provide cake for the party. The party will be at a restaurant and her sister said there will be about fifty people invited so discussed with her maybe to make cupcakes for convenience and avoid a cake slicing fee.


Her sister never requested specific flavors and such; she left it out for me to decide. The party invitation was my inspiration, it had zebra stripes with pink dots and came in a pink envelope -- it was the cutest thing! Right then I knew the cupcakes will have chocolate and vanilla flavors. And they will be flavors everyone will enjoy. Perfect!


I didn't want to use artificial colors and wanted something tart for the frosting so that's where the pomegranate jelly came in. It was also an excuse to use the jelly my husband just made from fresh pomegranates. It was delicious!


I made a dozen vanilla, another dozen chocolate and three dozen black-and-white cupcakes--the best of both.


Cupcakes Three Ways
adapted from Everyday Food, Issue #45

makes 12 cupcakes

8 TB (1 stick) unsalted butter, room temperature
1 3/4 cups all-purpose flour
2 tsp baking powder
1/2 tsp salt
3/4 cup sugar
2 large eggs, room temperature
1/2 cup sour cream
1 tsp pure vanilla extract


Vanilla Cupcakes


  1. Preheat oven to 350 degrees F. Line a 12-cup cupcake baking pan. In a medium bowl, whisk together flour, baking powder and salt; set aside.

  2. With an electric mixer, beat butter and sugar until light and fluffy. Add eggs one at a time, beating well after each addition. Add vanilla and mix until combined. On low speed, beat in half of the flour mixture, followed by sour cream; end with the rest of the flour mixture. Mix until just incorporated (DO NOT OVERMIX). Batter will be thick.

  3. Divide batter among prepared muffin cups, filling each 2/3 full. (A medium-sized ice cream scoop is useful to get equal amounts on each cup.) Bake until a toothpick inserted in the center of cupcake comes out clean, 22 to 24 minutes. Cool cupcakes in pan 5 minutes. Transfer to a wire rack to cool completely. Frost with Pomegranate Buttercream.

Chocolate Cupcakes

Reduce flour to 1 1/4 cups and add 1/2 cup unsweetened cocoa powder. Makes 12.


Black-and-White Cupcakes


Prepare both vanilla and chocolate batters; fill muffin cups with 3 tablespoons of each, side by side. Makes 24.


Pomegranate Buttercream Frosting
makes 1 1/2 cups

8 TB (1 stick) unsalted butter, room temperature
1 1/2 cups confectioners' sugar, sifted
1/2 tsp pure vanilla extract
3 - 4 tsp. pomegranate jelly

With an electric mixer, beat butter until light and fluffy, about 2 minutes. On medium speed, beat in sugar, 1/2 cup at a time, beating well after each addition and scraping down bowl as necessary. Mix in vanilla and jelly. Increase speed to high and beat until light and fluffy, about 5 minutes.


August 25, 2008

Pansit Palabok - Saucy Noodles with Pork Rinds!?!

My oldest brother, who lives in Tarlac, emailed me some pictures from his oldest son's birthday dinner last month. My nephew turned 8 years old and was proudly showing off his robot toy he got as a present along with his homemade birthday cake his Mom baked for him.

Right next to the cake is what grabbed my attention and made me drool. It's Pancit Palabok! It has been a while since I've had it. My parents would usually just buy them from Red Ribbon or cook with the powdered mix but I found it never tastes quite the same as I remember eating them in Manila.

Pancit Palabok always reminds me of my Mom's oldest sister who always gets commissioned to cook this dish on our parties. I remember watching her in the kitchen putting the dish together. She boiled and strain the noodles then ladled the simmering sauce and proceed to lay out the toppings one at a time. Then she would hand me the platter to put out in the dining table. I'd always be careful when I did this 'cause I'm afraid I'd disturb the the way my Auntie "designed" it; her work of art!

So I decided I should cook this from scratch just like my Auntie did. Based on what my Mom and sister knew about what goes into our Auntie's recipe and here's what I came up with.

Pancit Palabok

Ingredients:

2-3 Tbsp. cooking oil, more as needed
1 package medium-firm tofu, drained, patted dry and cut in 1/4 in. cubes
1o-15 cloves of garlic, finely minced
1 large onion, finely minced
1/4 cup flour
2 lbs. head-on shrimp, peeled, heads and shells reserved for shrimp stock
6 cups Shrimp Stock (recipe follows)
1/4 cup atchuete seeds soaked in 1/2 cup water for 10 minutes
1 1-lb. package pancit noodles
1 package chicharon, ground up
1 bunch scallions, green tops sliced (save white part for other use)
4 hard-boiled eggs
kalamansi wedges (or lemon)

Directions:

In a large saucepan, heat oil over medium-high heat. Fry tofu until lightly brown and crisp on all sides, about 3-4 minutes. Transfer to a paper-towel-lined plate to drain; set aside.

Lower heat to medium and in the same saucepan saute the garlic until lightly brown. Stir often as not to burn or overcook. (May need more oil, if needed). Remove all but a tablespoon to bowl and set aside.

Turn heat back to high and add the onions, cook until soft and fragrant, about 4-5 minutes.

Add the flour and stir frequently for a couple of minutes. Then add the fried tofu, shrimp, stock and atchuete water and let boil for 1 minute. Remove the shrimp as they cook so they don't get tough and set aside. Lower heat and let it simmer for 10-15 minutes or until thickened.

Meanwhile, boil another pot full of water for noodles. Boil until done and strain. Place noodles on serving platter.

The decorating starts! Ladle on the sauce until all the noodles are covered. Then sprinkle on the chicharon, reserved fried garlic and shrimp and scallions. Lastly, slice eggs and place on top. Serve with kalamansi wedges.

LinkWithin

Blog Widget by LinkWithin