Showing posts with label Fruit. Show all posts

February 9, 2015

Chocolate Meringue Cake


I had this craving for brownies AND pavlova over the weekend so a date was set Saturday night. Just me, my mixer and the oven. 

It is such a great mash-up of my two favorite desserts: chocolatey, cakey layer topped with crisp meringue softened with softly whipped cream. The strawberries added the fresh element that paired together with both the cream and chocolate. I'm sure other berries would work well, maybe even fruits in season. 

It was such an easy cake to whip up. The longest wait was spent for the cooling of the cake which is needed before the whipped cream is added. The finished cake is impressive, making others think more time and effort was spent. 

I didn't realize I had ran out of berries late Saturday night so cake was assembled and enjoyed after Sunday supper. My family was happy to enjoy this with me. And my sons now call this a "just because" cake. 
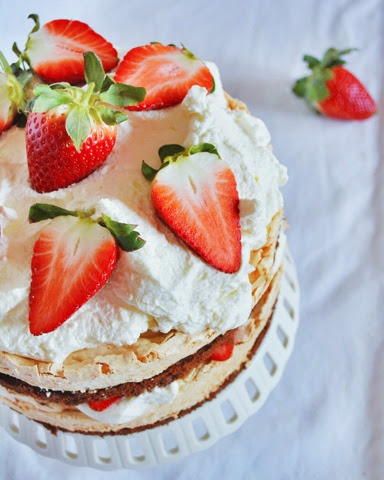


Chocolate Meringue Cake
adapted from The Joy of Baking

Chocolate Layer:
4 large egg yolks
175g AP flour
60g cocoa powder
1 1/2 tsp baking powder
1/4 tsp salt
152g butter, room temperature
130g granulated sugar
1 1/2 tsp vanilla extract
110g milk, room temperature
Meringue Layer:
4 large egg whites
1/4 tsp cream of tartar
175g granulated sugar
Chantilly Cream:
480g heavy whipping cream
45g granulated sugar
1 tsp vanilla extract

Preheat oven to325F. Prepare two 8-inch springform cake pans by oil spray and lining with parchment then spray again.

Sift flour, cocoa powder, baking powder and salt into a medium bowl, set aside.

In a mixer with paddle attachment, cream butter over medium-high speed, adding sugar a tablespoon at a time. Once added, keep mixing until light and fluffy, about 5 minutes.

Reduce speed to medium and add egg yolks one at a time, beating well after each addition and scraping bottom of bowl.

Reduce speed to low. Add cocoa-flour mixture in 3 batches alternating with milk and beat until just combined.

Place batter into your prepared pan. The batter will be thick, it helps to smooth out with an offset spatula, set aside.

In a clean mixer with whisk attachment, beat egg whites in medium speed with cream of tartar until frothy. Turn speed to high and beat until stiff peaks form.

Evenly divide meringue between the two pans, smoothing tops. Bake for 24-28, switching sides halfway through. Transfer in rack to cool completely.

To make the Chantilly cream, place cream, sugar and vanilla in a chilled bowl and whisk until soft peaks form.

To assemble: place one layer of cake, meringue side up on a serving plate. Spread half of the cream and add berries in an even layer. Top with second layer of cake and repeat. Best served the day it's assembled. Cake can be kept in the refrigerator for a day.  

January 12, 2015

Calamansi Bundt Cake


Celebrating winter and it's citrus bounty with cake made from fruits native to my home country: calamansi. 

Even though I have a small tree that's been good to me, I still get a thrill when I come across them in the markets and try to hoard them. 

My family has been enjoying drinking calamansi juice and wanted to make something else different besides the usual curd and cookies. A Bundt cake is always impressive with it's size and curves without the need for frosting. 


The glaze gives it a boost of calamansi flavor and sealed in the moisture that it was even flavorful even after a couple days. The addition of sour cream made the cake tender and gave it tangy that complements the calamansi. 

The recipe was adapted from Martha Stewart. I used calamansi liqueur (calamansi that I have been steeping in vodka for a couple months) but other citrus liqueur (like limoncello) or more fresh juice can be added to substitute. 


Calamansi Bundt Cake

For the cake:
2 Tbsp. finely grated calamansi zest, from about 35 calamansi 
400g (2 cups) granulated sugar
225g (8 ounces/1 cup/2 sticks) unsalted butter, room temperature, plus more for pan
360g (3 cups) all-purpose flour, plus more for pan
5g (1 tsp) baking soda
5g (1 tsp) salt
6 large eggs
180g (3/4 cup) fresh calamansi juice, from about 35 calamansi
2 Tbsp. calamansi liqueur 
1 tsp. vanilla extract
180g (3/4 cup) sour cream, room temperature

For the glaze:
240g (2 cups) confectioners' sugar
1 Tbsp. finely grated calamansi zest
60g (1/4 cup) calamansi juice


1. Preheat oven to 350°F. Butter a 12-cup Bundt pan and dust with flour, tapping out the excess. 
2. Stir together calamansi zest and sugar in a small bowl until well blended. Set aside. In a medium bowl, whisk together flour, baking soda and salt. 
3. In a mixer in medium-high speed, cream butter with sugar-calamansi mixture until pale and fluffy, 4-5 minutes. Add eggs, 1 at a time, beating well after each addition. Beat in juice and extract. Reduce speed to low. Add flour mixture in 3 batches alternating with sour cream and beat until just combined. 
4. Transfer batter to prepared pan, smooth top and tap pan firmly on counter few times. Bake until tester comes out clean, 45 to 50 minutes. Place on wire rack to cool 30 minutes. Turn out cake onto rack to cool completely. 
5. Make glaze by whisking together confectioners' sugar and calamansi juice until smooth. Pour glaze evenly over cake, letting it set before serving. Cake can be stored at room temperature under cake cover, up to 2 days. 


November 16, 2011

Coconut Pandan Chiffon Flan Bundt Cake

I've been thinking for weeks now of what bundt to bake to celebrate National Bundt Day with Mary, The Food Librarian. She has been posting a bundt every single day for thirty days leading up to this food holiday. I've even gone through her archives and round-up from the previous years. Last minute inspiration while thinking about my last year's Ube Chiffon Flan Bundt led me to bake a Coconut Pandan Chiffon Flan Bundt Cake.

Pandan is a tropical plant widely available and used in cooking in Southeast Asia. My Lola always told me to place a pandan leaf in the water when cooking rice to make it special; I would be the one told to cut a leaf off our plant in the backyard. I didn't mind since I know I'm in for something special - just the lovely scent that fills the house as it cook is just heavenly.

I have not had luck finding a pandan plant here in US but the leaves can be found in the frozen section of most Asian stores. Some stores will have fresh leaves once in a while so that's when I stock up. Pandan's flavor matches perfectly with coconut, a popular Filipino dessert is Coconut Pandan Gelatin with strips of young coconut and green cubes of pandan gelatin.

Taking those flavors and putting it in a cake form with added leche flan (and caramel) puts this cake over the top! The smooth, creamy coconut leche flan along with light and airy coconut pandan chiffon cake are like yin and yang textures but with both flavors in harmony.

There are plenty of steps in making the cake but don't let that deter you. I promise it's all worth it!


Coconut Pandan Chiffon Flan Bundt Cake

For Coconut Flan:
1 cup sugar
1/4 cup water
7 egg yolks
1 cup unsweetened coconut milk
1 cup sweetened condensed milk
1 tsp vanilla
pinch salt

For Coconut Pandan Chiffon Cake:
240g (2 cups) all-purpose flour
300g (1 1/2 cups) granulated sugar
15g (1 TBSP) baking powder
5g (1 tsp) salt
7 pandan leaves, chopped into 1-inch pieces
3/4 cup unsweetened coconut milk
125ml (1/2 cup) vegetable oil
7 large eggs, separated
1 tsp. vanilla extract
few drops pandan essence
1/2 tsp. cream of tartar
  1. Make the caramel. Mix sugar and water together in a small saucepan and stir until sugar dissolves. Bring mixture to boil in medium-high heat until golden brown in color. Immediately pour into bundt pan, swirling caramel around until it covers the bottom and sides of pan. (Bundt pan will become hot from caramel, wear protective mitts!) Set aside to cool.
  2. Preheat oven to 325 degrees. Bring a pot full of water to boil needed for bain marie.
  3. In a bowl, stir egg yolks. Add both milks and vanilla extract and salt. Stir to combine completely. Strain mixture to rid of yolk solids and set aside while you prepare the chiffon cake.
  4. In a large bowl, whisk together flour, sugar, baking powder, and salt; set aside.
  5. Place pandan leaves and coconut milk in a blender and puree until all leaves are finely shredded and mixture looks green. Strain through several layers of cheesecloth, squeezing out all the liquid.
  6. Add oil, egg yolks, vanilla and pandan essence to the pandan-coconut mixture. Stir thoroughly to combine. Add to flour mixture and whisk until smooth.
  7. In another large bowl, beat egg whites and cream of tartar using an electric mixer until stiff peaks form. With a rubber spatula, gently fold beaten egg whites into batter, a third at a time, just until incorporated. Set aside.
  8. Pour leche flan mixture into the caramel-lined bundt pan.
  9. Spoon the chiffon cake batter into the bundt pan. DON'T WORRY, THE CHIFFON CAKE BATTER WILL STAY FLOATING ON TOP OF LECHE FLAN. Fill only up to 2 inches from top of pan -- batter will rise as the cake bakes. *You will have leftover chiffon batter, enough to make 6 cupcakes; something to tie you over while your bundt cake chill overnight. :)
  10. Pour boiling water into a bigger roasting pan - this is your bain marie. Place the bundt pan in and bake for 45-50 minutes. Check doneness of cake by inserting toothpick.
  11. Take out of oven and let cool completely.
  12. Cover top with plastic wrap and place in refrigerator to chill at least 4 hours, preferably overnight.
  13. To serve, invert onto a plate and enjoy!
 

October 27, 2011

Fresh Fig Ice Cream with Blue Cheese Cookies

 
It's been many years now that my family have been enjoying our neighbor's bounty of figs; we are truly lucky to have friends willing to share them with us. Our neighbor have several trees of Black Mission variety in his property, also ones he grew from cuttings he brought in from his home country that have finally started to bear fruit this year. So for weeks,my family and I would feast on figs every single day.

We eat them fresh as is, or with cheese and crackers for a snack. We also make our usual jam to be enjoyed months later. And every year, I try new recipes using figs for my family to enjoy. We've already made Fig Newton and Fig Bars which is always a hit with my kids. I've also baked them into a Fig and Almond Cake before and just recently paired them with goat cheese to make Cheesecake Muffins.

Fresh Fig Ice Cream is a totally different way of enjoying figs. A simple recipe, basically a fig jam blended with cream, but it's the coldness on your tongue and added creaminess that makes this a really decadent treat.


I also baked some blue cheese cookies to enjoy with the ice cream for an added savory component. They also added another texture, crisp edges and soft centers of the cookies -- I loved the combination of two together.

I played around and made some ice cream sandwiches but with mixed results. I think because I placed the assembled ice cream sandwiches back in the freezer and the cookies hardened. This made it difficult to bite into and resulted in the ice cream being squeezed out from the sides. Next time, they just need to be enjoyed right away.


Fresh Fig Ice Cream
adapted from David Lebovitz, recipe in Serious Eats

2 pounds (1 kg) fresh figs (about 20)
125 ml (1/2 cup) water
1 lemon
150 g (3/4 cup) granulated sugar
250ml (1 cup) heavy cream
1/2 tsp freshly-squeezed lemon juice, or more to taste
  1. Cut stems off the figs and cut into 8 pieces. Place figs in a medium pan with water and zest from lemon. Cover pot and bring to a boil over medium-heat. Stir occasionally and cook until they are tender, about 10 minutes.
  2. Remove lid, add the sugar and continue cooking. Keep stirring until thickened or has consistency of jam. Remove from heat, let it cool completely. Transfer to a blender of food processor and puree to desired consistency (I left mine with little chunks of figs, you may process until smooth).
  3. Add cream and lemon juice to blender and combine. Taste for flavor, add more lemon juice if you needed.
  4. Place in the refrigerator to chill completely. Freeze following your ice cream makers instructions.
*Fresh Fig Jam can be made by following above recipe, using only the first four ingredients and follow instructions up to step 2.

Blue Cheese Cookies
adapted from :pastry studio:

175g (6 oz) blue cheese, softened
56g (4 Tbsp) butter, softened
80g granulated sugar
1/4 teaspoon salt
180g (1 1/2 cup) flour
  1. Place blue cheese, butter, sugar and salt in a food processor and blend until creamy.
  2. Add flour and pulse until it comes together. Remove and form into two disks of dough.
  3. Cover completely with plastic wrap and place in the refrigerator to chill overnight.
  4. Preheat oven to 325 degrees F.
  5. Roll dough into 1/4-inch thick and cut out cookies using cutter, about 2 inches in size.
  6. Place in a parchment-lined baking sheet, bake for 15-18 minutes, or until edges are golden.
  7. Transfer to wire rack to cool completely. Store in an airtight container.

October 23, 2011

Calamansi Coconut Muffins

I had thought about sitting out on this week's Muffin Monday since I have already made plans to bake two birthday cakes this week. But when Anuradha sent us the challenge to bake Citrus Coconut Muffins, I immediately thought calamansi (kalamansi) so I knew I couldn't refuse baking these.

The original recipe asked for zest from lemons and oranges and I used calamansi all the way. I'm sure any citrus of your choice would work here. No other flavorings were needed so the flavor and lovely scent of calamansi came through with each bite. Calamansi peels are also great candied, Ive done some here; their peels tastes just like the ones from kumquats - delicious!

This recipe is also put together in an unusual way where it ask to "rub in" the butter, the way a biscuit or scone is done. I had actually ran out of milk so my usual homemade yogurt came to the rescue, which gave them a tang that complemented the calamansi. Then thought while mixing the batter if I could've used coconut milk as well; something I will try when I bake these muffins again.


I decided to make 12 mini muffins and 6 regular-sized. The smaller ones were topped with unsweetened dessicated coconut and used large coconut flakes (like the ones I used for Pinipig, Coconut and Chocolate Granola Muffins) for the regular ones. Both muffin pans were placed in the oven at the same time. Fifteen minutes passed and the minis were ready but noticed the large coconut flakes were already toasted even though they still had 10 minutes of baking to go! A quick tent with foil saved them (but then, they were devoured by the family before I can take any pictures). I would imagine sweetened coconut will toast quicker due to the sugar so make sure to keep checking those muffin tops when you bake these.

Calamansi Coconut Muffins
makes 12 regular or 24 mini

150g (1 1/4 cup) white whole wheat flour
150g (1 1/4 cup) all-purpose flour
200g (1 cup) granulated sugar
90g (6 1/2 TBSP) butter, cut into 1/2-inch pieces, chilled
2 1/2 tsp baking powder
1/2 tsp salt
1 egg, lightly beaten
180g (3/4 cup) whole milk yogurt, room temperature
zest from 12 calamansi, finely grated (I used a microplane)
unsweetened dessicated coconut, for topping

Preheat oven to 385F degrees. Prepare muffin pan by either greasing or using liners.
In a large bowl, whisk together both flours, sugar, baking powder and salt. Add butter and work in with a pastry cutter.
In another bowl, combine eggs, yogurt and zest. Pour into the large bowl with the flour mixture. Mix until just combined.
Place in the prepared pans. Bake for 22-25 minutes (13-15 minutes for mini size) or until toothpick test is clear.
Remove and let cool slightly before taking out of pan. Serve warm.

Muffin Monday is an initiative by Baker Street. A culinary journey of sharing a wickedly delicious muffin recipe every week. Drop in a quick line to join her on her journey to make the world smile and beat glum Monday mornings week after week.

October 21, 2011

Apple Cake with Cream Cheese Maple Frosting


This month marks the third year baking with The Cake Slice; we will be baking from The Cake Book by Tish Boyle. The book have separate chapters from chiffon cakes to pound cakes, butter-based cakes and fruit-based ones, flourless cakes, mousse and ice cream cakes, even chapters on cheesecakes and meringue cakes. I'm very excited to be baking from this book and have many recipes already bookmarked!

I really like that the recipes are written including weight (grams and ounces) along with the volume measurements. American cookbooks are still slow in adapting this type of measuring. When I started measuring ingredients with a kitchen scale a few years back, I noticed a vast improvement on my baking -- and importantly, my baked goods came out with consistent results. (If you don't have one, I highly recommend making an investment and purchasing one; they are not at all expensive). I am just happy to not be wasting time converting measurements and get on to baking when I use this cookbook.

On to our first cake: Apple Cake with Cream Cheese Maple Frosting. A perfect cake to celebrate Autumn. Chunks of apples, tender and still slightly crisp at the same time, along with walnuts make up this cake, warmly perfumed by cinnamon, cloves and ginger. Topped with cream cheese with maple flavoring and dusted with freshly-grated nutmeg for a really decadent slice. It's a simple, unpretentious cake that can be enjoyed anytime.


You can read Tish Boyle's blog here: http://www.tishboyle.blogspot.com/
Please follow her on Twitter: http://twitter.com/#!/tishboyle


Apple Cake with Cream Cheese Maple Frosting
adapted from The Cake Book by Tish Boyle
makes one 9-inch square cake, serving 12

181g (1 1/2 cups) all-purpose flour
1 tsp baking powder
1 tsp ground cinnamon
1/4 tsp ground cloves
1/4 tsp ground ginger
1/4 tsp baking soda
1/8 tsp salt
113g (1/2 cup) unsalted butter, softened
217g (1 cup firmly packed) light brown sugar
1 tsp vanilla
2 large eggs
160ml (2/3 cup) buttermilk*
120g (2 cups) peeled and chopped 1/3-inch pieces Granny Smith* apples
57g (1/2 cup) walnuts, coarsely chopped
  1. Preheat oven to 350F degrees. Grease pan and line bottom and two sides with a strip of parchment paper, leaving a 2-inch overhang on the two sides. Butter paper and set aside.
  2. In a medium bowl, whisk together flour, baking powder, cinnamon, cloves, ginger, baking soda and salt. Set aside.
  3. Place butter in the bowl of mixer and beat with paddle attachment at medium speed until creamy, about 1 minute. Slowly add the sugar and beat at medium-high speed until blended and lightened in color, about 2 minutes. Add the vanilla extract. Then add the eggs, one at a time, beating well and scraping sides as needed. Reduce speed to low and add the flour mixture in three additions, alternating it with the buttermilk in two additions and mix just until blended. Fold in the apples and walnuts.
  4. Transfer batter into pan, smooth the top and bake for 25 to 30 minutes, until golden and toothpick test is clean. Cool cake in pan on a wire rack.
  5. Frost top of cooled cake with Maple Frosting.
Cream Cheese Maple Frosting
makes 1 1/3 cups

170g (6oz) cream cheese, softened
42g (3 TBSP) unsalted butter, softened
1/2 tsp vanilla extract
1/8 tsp maple flavoring*
1/8 tsp ground cinnamon
1/8 tsp ground ginger
pinch of salt
pinch of freshly grated nutmeg
115g (1 cup) confectioneres' sugar, sifted

Using paddle attachment, beat cream cheese and butter together at medium speed until smooth. Add extracts, spices and salt. Reduce speed to low, add the confectioners' sugar and beat until well blended. Raise speed to high until light and creamy, about 2 minutes.

*I used homemade whole milk yogurt, Honeycrisp apples and maple syrup.

October 16, 2011

Clementine Date Muffins for Muffin Monday


I am happy to welcome another week with these Clementine Date Muffins.

Just lightly-sweetened muffins filled with chopped dates and cashews, perfumed with zest of clementines. Freshly-squeezed juice along with yogurt and just a little bit of butter gives these muffins a tender and moist crumb. Surprisingly not a dense loaf I was expecting which I usually think of dates in baked goods.

Cinnamon in the batter gives them an extra spicy flavor with the option of adding cinnamon sugar topping. I opted to add sanding sugar for the sparkle. :)


Please click on over The Baker Street  for the original recipe and other variations from the rest of the Muffin Monday Bakers.

Clementine Date Muffins
makes a dozen regular-sized muffins
120g (1 cup) white whole wheat flour
120g (1 cup) all-purpose flour
96g (1/2 cup) light brown sugar
10g (2 tsp) baking powder
3g (1/2 tsp) baking soda
3g (1/2 tsp) salt
2g (1/2 tsp) cinnamon
zest from 3 clementines, finely grated (or up to 2 tsp)
80g (1/3 cup) freshly-squeezed clementine juice
56g (1/4 cup) butter, melted and cooled
160g (2/3 cup) plain, whole-milk yogurt
1 large egg, room temperature
90g (2/3 cup) dates, chopped
80g (2/3 cup) cashews, chopped
sparkling sugar for sprinkling

Preheat oven to 400F degrees. Prepare muffin tins by greasing cups or using liners.
In a large bowl, whisk together flours, sugar, baking powder, soda, salt and cinnamon until well-combined.
In a medium bowl, combine orange juice, butter, yogurt and egg.
Add wet mixture into dry ingredients. Quickly stir until just combined.
Fold in dates and cashews.
Place into prepared muffin tins. Sprinkle tops with sparkling sugar.
Bake for 18-22 minutes or until toothpick test comes out clean.
Remove and let cool in pan for about 5 minutes. Take muffins out of pan and serve.

Muffin Monday is an initiative by Baker Street. A culinary journey of sharing a wickedly delicious muffin recipe every week. Drop in a quick line to join her on her journey to make the world smile and beat glum Monday mornings week after week.

September 26, 2011

Carrot Spice Muffins


I am not much of a fan of carrot cakes so was surprised to find these carrot spice muffins to my liking.

A healthy recipe using whole wheat flour and warmed up by spices that evoke Autumn. I liked that you can either use brown sugar or honey to sweeten it though decided to try agave syrup since I've been wanting to try baking with it. You may also use buttermilk or yogurt plus even more choices either using oil, melted butter or applesauce. I opted to use yogurt and applesauce since I just have made them earlier in the week.

I also added crushed pineapples in lieu of raisins plus cashews for crunch. I originally thought of adding a glaze but the muffins were sweet enough that decided they didn't need them. These were baked for our afternoon snack, hoping some will last for next day's breakfast. But of course that didn't happen.


Carrot Spice Muffins
makes 12 standard size muffins

The recipe is from Whole Foods for The Whole Family by La Leche League International Cookbook and can be found here.

180g (1 1/2 cups) white whole wheat flour
5g (1 tsp) baking soda
5g (1 tsp) baking powder
3g (1/2 tsp) coarse salt (optional)
2g (1/2 tsp) ground cinnamon
1g (1/4 tsp) nutmeg
pinch (1/8 tsp) ground ginger
pinch (1/8 tsp) allspice (I omitted this one)
108g (1/3 cup) agave syrup (or honey or brown sugar)
1 egg, room temperature
120g (1/2 cup) yogurt
80g (1/3 cup) applesauce
3g (1/2 tsp) vanilla
175g (1 1/2 cups) finely grated carrots
150g (1/2 cup) crushed pineapple
64g (1/2 cup) chopped cashews

Preheat oven to 400F. Prepare muffin tray either by using paper liners of pan spray.
In a large bowl, whisk together flour, baking soda, baking powder, salt (if using) and spices.
In another bowl, beat eggs with agave syrup, yogurt, applesauce, vanilla, grated carrots, pineapples and cashews.
Add wet ingredients to the dry, stir gently until it comes together.
Divide among 12, about three-quarters full. Bake for 15-17 minutes or until it pass toothpick test.
Remove from pan immediately and let muffins cool on rack for few minutes before serving.

Muffin Monday is an initiative by Baker Street. A culinary journey of sharing a wickedly delicious muffin recipe every week. Drop in a quick line to join her on her journey to make the world smile and beat glum Monday mornings week after week.

September 20, 2011

Blackberry-Pecan Snack Cake for The Cake Slice

This will be the last month The Cake Slice will be baking from the book Cake Keeper Cakes by Lauren Chattman. I have not been very active this year with our baking group due to work so made sure I made time this weekend to bake Blackberry-Pecan Snack Cake.

It just happens that my mother-in-law was also throwing a small party this weekend and she had put me in charge of desserts. I know that she adores fruits and streusel in her baked goods so made this cake for her.
The recipe asked for blackberries but blueberries or raspberries may also be used. I happen to have all three so decided to put a combination of all three berries. A simple recipe that uses only a little bit of butter with sour cream giving it richness. The batter is spiced by cloves and nutmeg while the streusel has cinnamon along with chopped pecans.
The party got a little hectic but was able to take a quick picture of the desserts table. Along with the Blackberry-Pecan Snack Cake front and center, I also baked Peanut Butter & Jelly Mini Muffins, Guava & Cheese Pastries, Leche Flan, Cheesecake with Blueberry Sauce, Coconut Sandwich Cookies with Passion fruit Cream and Brownies. My husband joined in the baking fun by making Cream Puffs and Seven-Layer Gelatin.
The cake was quickly eaten even with the assortment of other desserts on the table. I was glad I made time to bake this cake.

The Blackberry-Pecan Snack Cake recipe can be seen at Amazon, just click the "look inside" the book function.

September 19, 2011

Peanut Butter and Jelly Muffins


It has been one of those weekends, very busy but enjoyed every minute of it! My mother-in-law had a small party at her house and she put me in charge of desserts. I was very excited to get baking and actually spent a whole day and a half baking treats. (I took a quick picture and shared it on Twitter.)

One of the treats are these Peanut Butter and Jelly Mufins, a simple and easy recipe with flavors that appeal to any kid, especially the young at heart.


Peanut Butter and Jelly Muffins
makes 24 mini muffins

The original recipe uses milk and a teaspoon of lemon zest, I used yogurt and vanilla. I also added a few sprinkles, just a little something since these were bound for a party after all. :)

245g (1 3/4 cups) all-purpose flour
100g (1/2 cup) sugar
15g (1 TBSP) baking powder
5g (1/2 tsp) salt
2 eggs
160ml (2/3 cup) whole milk yogurt, room temperature
1/3 cup butter, melted
1 tsp vanilla extract
1/2 cup peanut butter
1/2 grape jelly
sprinkles, optional

Prefheat oven to 375F degrees
In a medium bowl, whisk together flour, sugar, baking powder and salt to combine.
In a small bowl, beat eggs. Mix in yogurt, butter and vanilla.
Add the wet ingredients over the dry ingredients. Quickly stir to combine but do not overbeat.
Spoon batter into muffins tins halfway. Add peanut butter jelly in the center. Cover with more batter until its filled to top. Place a few sprinkles, if using.
Bake for 15-17 minutes or until it pass toothpick test.
Remove from oven, let cool in pans for 5 minutes. Remove from pan and serve.

September 12, 2011

Pinipig, Coconut & Chocolate Granola Muffins

This week's Muffin Monday recipe came courtesy of New York Times' Recipes for Health series. The muffin consists of granola baked along whole wheat flour, sweetened by raisins and a touch of honey. The healthiest muffin baked so far by the Muffin Monday bakers!

I had planned on making granola for this muffin recipe but weekend plans got the best of me so ended up using this organic granola. I followed the recipe only altering it by using whole wheat pastry flour but had to say the recipe gave me not-so-good results. The muffins came out with flat domes and burnt edges even after they've only baked for 15 minutes. Imagine if I waited to checked in 20 minutes like the recipe stated? Crunchy edges aside, I had to taste these muffins which were not at all bad (but not spectacular either). Not too sweet which I prefer but a bit one-note. My oldest son described it best when he said it tasted like raisin bran. My granola of choice might be the culprit since it was very plain. I realized then that the success of these muffins depend greatly on the granola used.

So off to bake again, this time using ingredients I would use to make my own granola: pinipig, coconut flakes and chocolate. Pinipig is glutinous sweet rice that was harvested while still young and pounded flat. Fresh pinipig is usually bright green but quickly loses it color as it dries. Puffed rice (Rice Krispies' Snap, Crackle & Pop) can not compare to pinipig in terms of flavor and crunch.(More information on pinipig from Market Manila here.) Toasting them before use makes it even better; the heat releases their light sweet rice fragrance.


So the second time around I can say is a success; the muffins came out with a light, fluffy texture with still-crunchy pinipig here and there. The coconut flakes throughout made for a satisfying chew while the tiny pieces of bittersweet chocolate added a little sweet bonus.

Pinipig, Coconut & Chocolate Granola Muffins

85g pinipig
140g (1 cup) whole wheat pastry flour
10g (2 tsp) baking powder
2g (1/4 tsp) salt
2 eggs
355ml coconut milk
60ml vegetable oil
1 tsp vanilla extract
60g coconut flakes
80g bittersweet chocolate, coarsely chopped

In a dry skillet, toast pinipig over medium heat, stirring constantly to avoid burning (about 10 minutes). Remove from heat and set aside to cool.
Preheat oven to 350F degrees. Prepare muffin tins with pan spray.
In a small bowl, whisk together flour, baking powder and salt.
In a medium bowl, beat eggs along with coconut milk, vegetable oil and vanilla.
Stir in the pinipig, coconut flakes, and chocolate into the wet mixture
Sift in the flour mixture and stir only until moistened.
Spoon into muffin tins, filling 3/4 full.
Bake for 15-18 minutes, or until it pass toothpick test.
Remove from oven. Let it cool in pans for 10 minutes. Remove from tin and enjoy.

A big "Thank You" goes to Anuradha for all the work she does week after week. Check out her Granola Muffins along with the links to all my fellow Monday Muffin bakers.

Muffin Monday is an initiative by Baker Street. A culinary journey of sharing a wickedly delicious muffin recipe every week. Drop in a quick line to join her on her journey to make the world smile and beat glum Monday mornings week after week.

September 5, 2011

Goat Cheese and Figs Cheesecake Muffins

I'm so glad I was able to join this week's Muffin Monday. My unpredictable work schedule can sometime make me feel like a stranger in my own kitchen so suddenly finding myself with three full days off from work helped me get reacquainted and start baking again. So far I've baked semolina corn bread, made cherry frozen yogurt and bake a chocolate birthday cake for my sister-in-law.

I also baked these Cheesecake Muffins that were easy to put together. Delicious cakey muffins filled with creamy cheese and fresh fruit. The original recipe asked for strawberries but I decided to put figs since I had just got back from picking a basketful of figs off my friend's tree. I used goat cheese since they pair so well with figs.


Goat Cheese and Figs Cheesecake Muffins
makes 12

350g (2 1/2 cups) all-purpose flour
140g (3/4 cup) caster (powdered, not confectioner's) sugar
15g (1 TBSP) baking powder
finely grated zest of 2 medium oranges (I used tangerine)
1/2 tsp salt
2 large eggs, room temperature
250ml (1 cup) whole milk, room temperature
85g (6 TBSP) butter, melted and cooled
175g (6 ounces) goat cheese, room temperature
6 small figs, halved

Preheat oven to 400F degrees. Prepare a standard muffin tray with liners.
Sift flour, sugar, baking powder, zest and salt into a large bowl.
In a small bowl, beat eggs. Add milk and butter and mix together.
Add wet mixture to the dry ingredients. Batter will be lumpy, do not overmix.
Fill tins halfway with batter. Spoon a teaspoon of goat cheese and top with half a fig. Spoon batter to cover tops.
Bake for 15 minutes or until toothpick test is clean. Remove and let it cool slightly before serving.

Soon after the Goat Cheese and Figs Cheesecake Muffins came out of the oven, I've gone and baked another batch. This time using cream cheese (since I've already used all the goat cheese) along with raspberries. These muffins were also a hit. Next time, I will try mascarpone cheese. What other cheese do you think will work?

Muffin Monday is an initiative by Baker Street. A culinary journey of sharing a wickedly delicious muffin recipe every week. Drop in a quick line to join her on her journey to make the world smile and beat glum Monday mornings week after week.

August 14, 2011

Doughnut Muffins for Muffin Monday


Ever since I joined Muffin Monday, I find myself looking forward more enthusiastically to Mondays. I mean a little baked good can really get your week to a great start. This week's recipe is Doughnut Muffins, the easiest recipe so far.


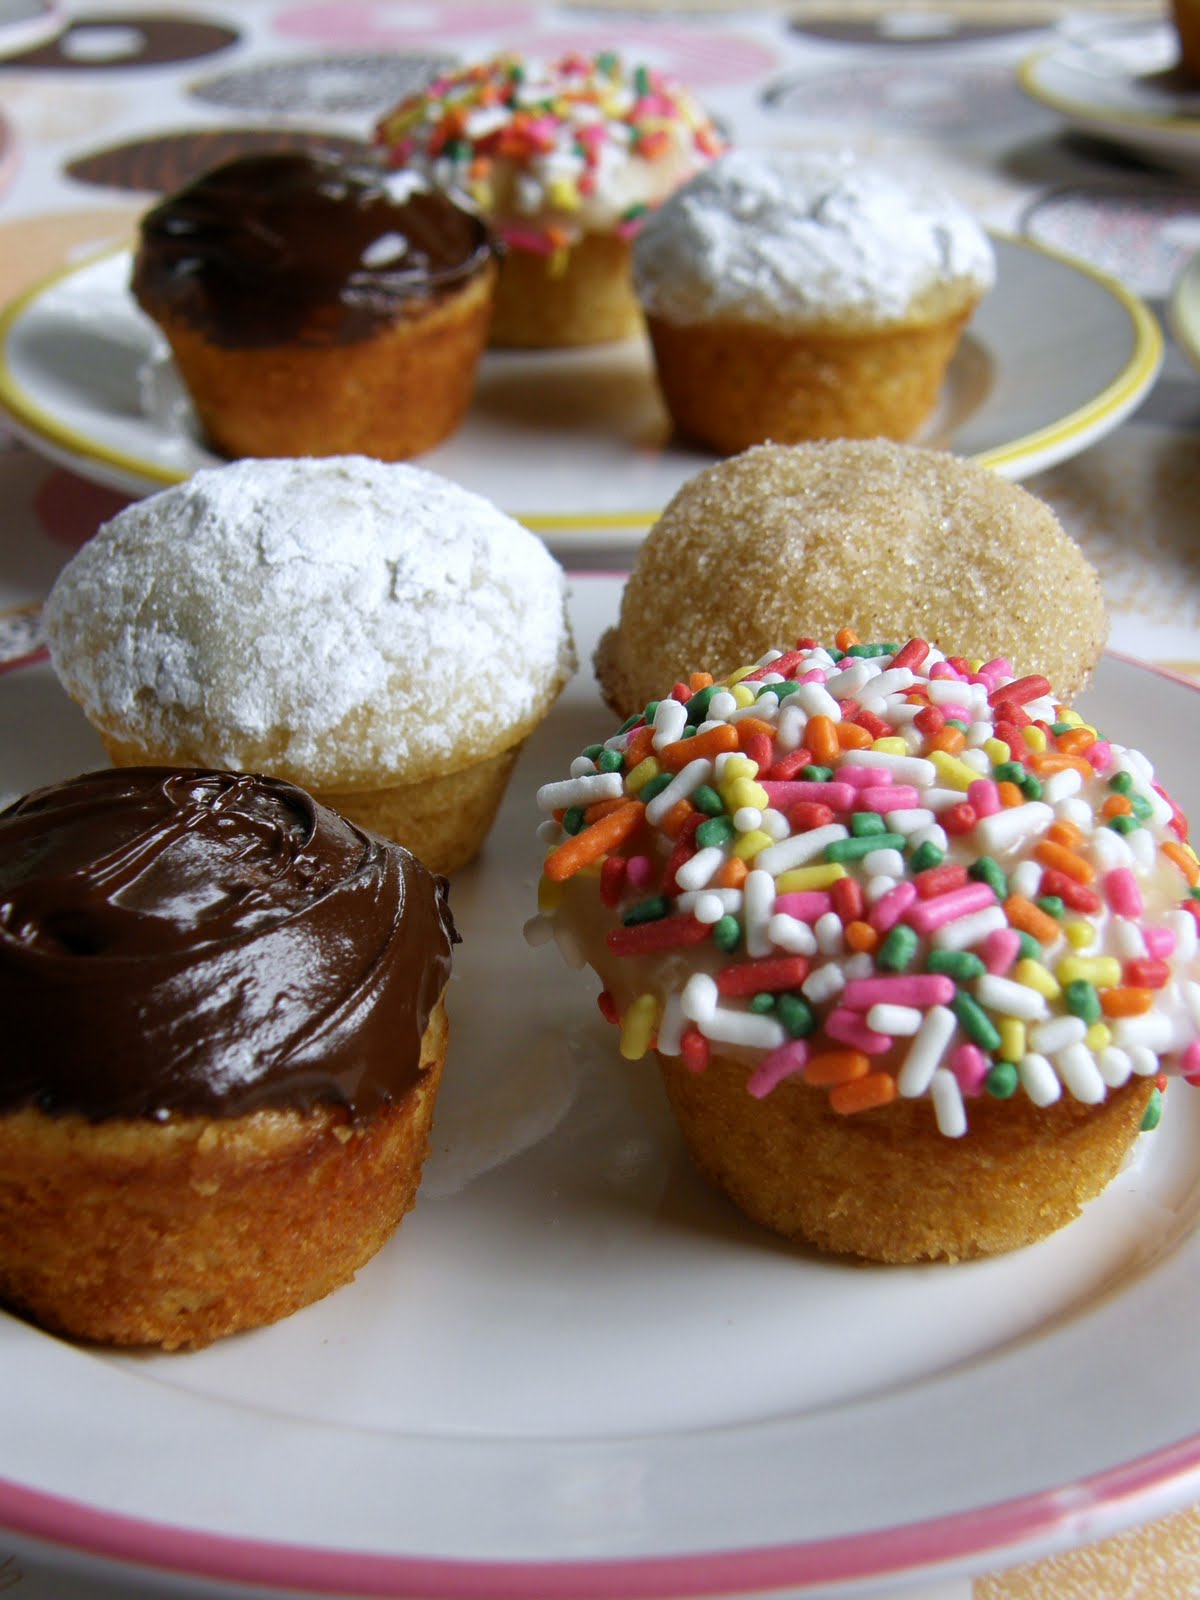
The original recipe makes about 10 regular-sized muffins. I decided to make mini muffins to mimic the doughnut holes and I yielded 24 minis. These muffins were just slightly sweet, baked with cinnamon and nutmeg, and dipped in more cinnamon sugar once they come out of the oven.


What made baking these muffins really fun for me was the option of adding a jam filling. I went crazy and added what I have in my pantry: candied kumquats, chocolate chips, passionfruit jam and pumpkin butter. :)


While they were baking, I thought to put different toppings so my family will know what's inside. Chocolate ganache for the kumquat, powdered sugar on the chocolate chips, sprinkles on the passionfruit and cinnamon sugar on the pumpkin butter ones.

My boys had lots of fun baking (and eating) these doughnut muffins that they've already requested to bake more this week. They have also made a list of fillings they want to want to try like peanut butter and grape jelly, Nutella, strawberry preserves and peach jam.

I wanted to try adding bacon jam myself. :)

Doughnut Muffins

250g (1 3/4 cup) all purpose flour
10g (1 1/2 tsp) baking powder
3g (1/2 tsp) salt
3g (1/2 tsp) ground nutmeg
2g (1/4 tsp) ground cinnamon
150g (3/4 cup) sugar
80ml (1/3 cup) oil
1 large egg, lightly beaten
180ml (3/4 cup) milk
fillings: jams, preserves, chocolate, Nutella

cinnamon-sugar topping:
1/4 cup melted butter
50g (1/3 cup) sugar
8g (1 tsp) ground cinnamon

Preheat oven to 350F degrees.
Prepare muffin pans, either with pan spray of liners.
In a large bowl, whisk together flour, baking powder, salt, nutmeg and cinnamon.
In a small bowl, combine sugar, oil, egg and milk. Stir mixture into the dry ingredients.
Fill pans halfway with batter, add half a teaspoon of desired fillings, top with more batter until 3/4 full.
Bake for 15-17 minutes or until toothpick test comes clean.
Remove from pan and brush tops with melted butter then dip in cinnamon sugar mixture.


Muffin Monday is an initiative by Baker Street. A culinary journey of sharing a wickedly delicious muffin recipe every week. Drop in a quick line to join her on her journey to make the world smile and beat glum Monday mornings week after week.

June 26, 2011

Lychee Mousse Cake


Though I have been absent here for a couple of months, I've been baking up plenty of cakes. Last month, my youngest son turned seven and I baked him his request for a pineapple cake. This month alone, six people I know celebrated their birthdays. They all love to receive a cake since I've started the tradition several years back of baking birthday cakes. This Lychee Mousse Cake was especially baked for my sister-in-law.


Lately, I've been experimenting with my go-to Chiffon Cake recipe and adapting it to different flavors. I like to pair the chiffon cakes with a similar lighter fillings and found mousse to be perfect. So far these past weeks I've made pineapple (for my son's Pineapple Chiffon Cake), strawberry, chocolate and vanilla (for my niece's Neapolitan Banana Split Chiffon Cake), and peach-mango (for my other niece).

I've even gone and baked a Turon Chiffon Cake. This was just to satisfy a craving for turon when I found myself stuck at home without lumpia wrappers. This one didn't have a mousse filling but turned out a success so hope to bake another one soon to share with you.

But for now I'd like to share you my Lychee Chiffon Cake. The cake were baked in cake pans instead of the traditional angel cake or tube pans. The airy Lychee Mousse was filled in between the two cake layers and more mousse were spread on top. The cake was then finished with a little whipped cream and left for a few hours in the refrigerator to set. I made the cake in the morning and we enjoyed it after my sister-in-law's birthday dinner.


I used canned lychees since they are readily available. Realizing the canned lychees had a tinge of peachy color from the canning process, I added a few drops of red food coloring which gave the yellow cake batter (yellow from the egg yolks) a salmon-peachy colored hue which complemented the lychees a little.

I have already made plans to make this cake again. Next time I will try adding a mirror glaze like the ones I always see on those fancy patisseries.


Lychee Mousse Cake
make 9-inch cake

For Lychee Cake:
1 cup all-purpose flour
3/4 cup granulated sugar
1 1/2 Tsp. baking powder
1/2 tsp. salt
1/2 cup vegetable oil
5 large eggs, separated
1 tsp. vanilla extract
1/2 cup lychee syrup (from the canned lychees)
1/2 tsp. cream of tartar
few drops of red food color, optional

For Lychee Mousse:
1 cup lychee
1/4 cup lychee syrup (from canned lychees)
1/4 cup water
1/2 cup sugar
2 egg whites
1/2 TBSP gelatin
1 cup whipping cream

Whipped Cream Frosting:
2 cups whipping cream
2 TBSP sugar
1 tsp vanilla extract


For Lychee Cake:
Preheat oven to 350 degrees. Use pan spray or butter to grease bottoms of two 9-in pans. Line them with parchment paper. Do not grease the parchment or sides of pans.

In a medium mixing bowl, whisk together flour, sugar, baking powder, and salt; set aside.

In a small bowl, add oil, egg yolks, vanilla, and lychee syrup; mix to combine. Add to flour mixture and whisk until smooth.

In another large bowl, beat egg whites and cream of tartar using an electric mixer until stiff peaks form.

With a rubber spatula, gently fold beaten egg whites into batter just until incorporated. (DO NOT OVER MIX or you will deflate the air bubbles and cake will not be light and airy.) Add food coloring is using.

Divide into 2 prepared pans. Bake until a toothpick inserted into center of cake comes out clean, about 20-22 minutes.

Invert pans on cooling rack and let it cool completely, about 1 1/2 hour.

For Lychee Mousse:
Place lychee and syrup together in a blender or food processor and puree. Pour into a large bowl and set aside.(A)

In a small pot on medium heat, boil water and sugar until it turns into a syrup, about 5 minutes. Do not let it turn color, syrup should still be clear. Meanwhile beat egg whites to soft peak. Then gradually add in sugar syrup in a slow steady stream until stiff peaks form. Be careful with the hot syrup. Set aside.(B)

Whip the cream until soft peaks form, do not overbeat. Set aside.(C)

In a small bowl, soak gelatin in 2 tbsp of water for about 5 minutes to bloom. Then melt the gelatin in the microwave 15-20 seconds. Stir and add into the lychee mixture.(A)

Fold in the egg white (B) and whipped cream (C) into lychee-gelatin mixture (A) until just combined.

Whipped Cream Frosting:
Chill the mixing bowl and whisk you will be using by placing in the freezer, about 10 minutes.

Add very chilled whipping cream in bowl along with sugar and vanilla. Whip until soft peaks form.

Cake Assembly:
Place one layer of cake on cake board. Spoon about 2/3 of lychee mousse. Spread evenly up to 1/2 edge of cake.

Top with the other cake layer and spoon the remaining mousse.

Decorate the sides of cake with whipping cream frosting.

Place in refrigerator to chill until set, 4-6 hours but overnight preferable.

June 20, 2011

Ginataang Bilo-Bilo for Kulinarya Cooking Club


This month's theme for Kulinarya is White to correspond for the wedding month of June chosen by Adora of Adora's Box and Diona of Tita Flips. 

I made Ginataang Bilo-Bilo, a snack or dessert that consists of tubers like sweet potatoes, yams and cassava plus tropical fruits like saba (or burro) bananas and jackfruit. It may also include sago (tapioca) pearls and all are simmered in sweetened coconut milk that produces a creamy sweet confection.


They are sometimes called Ginataang Halo-Halo due to similarities to the assorted ingredients you would find in the popular shaved ice treat. But once you put little chewy nuggets of glutinous rice, it somehow gets renamed Ginataang Bilo-Bilo to let you know you'll be getting something extra special.

My children all loved having these little rice balls, especially after I made Ube-Coconut Rice Balls. They especially liked forming them with their little hands, just like the way I remembered when they played with Play-Doh. And while we are cooking them, I especially never tire of watching their surprised faces once the balls float to the top of the boiling water.


I remember eating bowlfuls of this growing up. My family would always make them by the pot. We served ourselves, ladle them out into bowls to enjoy straight away. This way is especially good for warming up during the cold and rainy season. But during the humid, hot summers I would place my bowl and in the fridge (in the freezer if I'm being impatient) and wait a little while to enjoy and savor each spoonful. When eaten cold, the coconut milk thickens even more giving it an almost pudding-like consistency.

This treat is naturally gluten- and dairy-free and very easy to make. Glutinous rice flour is available in Asian markets and Asian aisle of major supermarkets. Do not let the term glutinous confuse you, it does not have gluten. This only means that the rice flour is made from a sticky type of sweet rice.


Ginataang Bilo-Bilo
serves about 6

1/2 cup dried sago pearls
1/2 light brown sugar
3/4 cup glutinous rice flour
1/4 cup water (more, if needed)
2-13.5 fl. oz. cans coconut milk
1 small cassava/yucca, peeled and cubed
1 medium sweet potato, peeled and cubed
6 pods jackfruit, chopped
3 saba bananas, quartered lengthwise and chopped
1/2 cup sugar (or more to taste)


Prepare the sago pearls:
Place sago in a medium bowl and fill halfway with water. Over high heat, bring to a boil. Lower heat to medium-low and let it simmer for 15 minutes, stirring occasionally to avoid sticking together. Strain the sago and rinse under cold water. Check for doneness. If still hard and chewy, repeat process or until the center of each pearl becomes translucent. Drain and rinse under cold water. Place sago back in pot with 1/2 cup brown sugar and 2 cups of water. Heat until sugar dissolves. Turn off heat and let it cool. Set Aside.

Prepare the bilo-bilo:
In a small bowl place rice flour. Stir in water and mix thoroughly. If needed, add water a tablespoon at a time until dough comes together. Dough should be firm but pliable. Shape a piece into a log shape about 1/4 inch in diameter. Cut 1/4 inch piece off the log and shape into balls. Set aside.
Bring a pot filled halfway with water and let it boil. Once it comes to a rolling boil, lower heat to simmer and drop the rice balls, several at a time. Take them out as they float to the top. This takes about a minute to cook.

Prepare the Ginataan:
Place coconut milk and cassava into a medium-sized pot and bring to a boil over medium-high heat. Lower heat to low and let it simmer covered for 5 minutes.
Add the sweet potato and jackfruit. Stir in and let boil. Cover and let simmer 5 minutes.
Next to add is the bananas and sugar. Stir to combine and let it come to a boil another 5 minutes. Taste for sweetness, you may add more if you prefer it sweeter. Check for doneness of the cassava and potatoes and let it simmer until done. Do not let it boil over high heat, the potatoes may fall apart.
Add the sago (without the brown sugar syrup) and rice balls and simmer until heated through.


Enjoy right away warm. Any extra can be placed in the refrigerator and eaten cold.

LinkWithin

Blog Widget by LinkWithin